When the long, harsh Ontario winter finally breaks and the weather warms up across Ottawa, London, and the Greater Toronto Area, drivers feel a sense of relief. The days of warming up the car in a bitter freeze, scraping heavy ice off the windshield, and navigating treacherous, unplowed side streets are temporarily over.
However, as the final snowbanks melt away into local storm drains, they leave behind a quiet, destructive threat to your vehicle: thousands of kilograms of accumulated road salt, calcium chloride, and sticky liquid de-icing brines.
Throughout the winter months, municipal maintenance crews spread massive amounts of chemical melting agents across Ontario’s highway networks to keep traffic moving safely. While these compounds are essential for winter road safety, they are incredibly corrosive to automotive components.
As you drive through slush and wet snow, this chemical cocktail is thrown upward, coating your vehicle’s undercarriage, wheel arches, brake lines, and lower body panels in a thick crust of white residue.
Leaving this salt crust on your vehicle as spring arrives is an expensive mistake. When the weather gets warmer, the chemical reaction that causes rust and oxidation accelerates rapidly. Moisture in the spring air mixes with the trapped salt crystals, creating an aggressive corrosive environment that eats away at bare steel frames, thin aluminum heat shields, vital brake components, and delicate electrical connectors.
To protect your automotive investment, extend the lifespan of your vehicle, and prevent costly structural repairs, you must perform a thorough spring cleaning. This comprehensive, step-by-step checklist outlines exactly how to wash away Ontario’s corrosive road salt and restore your vehicle for the warm summer driving season ahead.
The Chemistry of Spring Rust: Why Warm Weather Accelerates Salt Damage
Many Ontario motorists believe that the greatest risk of rust occurs in the middle of Winter Road when the roads are covered in white salt dust. Chemical engineering tells a very different story.
The Temperature-Driven Oxidation Loop
The chemical reaction responsible for rust—the oxidation of iron-based metals—requires three distinct ingredients: iron, oxygen, and an electrolyte solution (water mixed with salt). The speed of this chemical reaction is directly tied to the surrounding temperature. In freezing temperatures, chemical processes naturally slow down. Trapped road salt sitting on a freezing cold frame rail at minus twenty degrees Celsius does relatively little damage because the cold limits molecular movement.
The real danger begins when spring temperatures climb above five degrees Celsius. As the ambient air warms up, the chemical reaction between the trapped salt crystals, atmospheric moisture, and your vehicle’s steel panels speeds up dramatically.
The salt acts as a chemical catalyst, drawing moisture straight out of the spring air and keeping the metal surface damp for long periods. This created environment accelerates metal degradation, converting clean structural steel into brittle, flaking iron oxide at a rapid pace.
Traditional Rock Salt vs. Modern Liquid Brines
The challenge has intensified in recent years due to changes in how Ontario municipalities manage winter road clearing. Historically, highway departments relied entirely on solid rock salt (sodium chloride). While rock salt is highly corrosive, its large crystal size means it tends to bounce off vehicle surfaces at high speeds.
Today, road crews frequently pre-treat major commuter arteries like Highway 401, Highway 400, and the QEW with liquid brine solutions made from calcium chloride or magnesium chloride. These liquid brines contain specialized “tackifying” additives designed to make the chemical solution stick to the dry asphalt before a snowstorm.
When you drive over a pre-treated highway, this sticky fluid atomizes into a fine, chemical mist that coats every nook, cranny, and hidden seam beneath your vehicle. It grips the metal tightly and resists natural wash-off from spring rain showers, requiring a deliberate mechanical effort to remove completely.
The Deep Undercarriage Wash—Targeting Hidden Corrosion Zones
The absolute first step on your spring car care checklist must be a meticulous, high-pressure cleaning of the vehicle’s completely hidden underbody. Simply running your car through a standard automated car wash with a brief “undercarriage spray” cycle is rarely sufficient to dislodge months of baked-on liquid brine crust.
Utilizing Specialized Underbody Attachments
To clean the underbelly of your vehicle properly, visit a self-serve coin car wash equipped with a high-pressure wand, or invest in a specialized multi-nozzle underbody cleaning attachment for your residential pressure washer. These attachments roll smoothly beneath the vehicle on small wheels, aiming multiple high-pressure water jets straight upward into the chassis to flush away packed grime and salt deposits.
When executing an underbody wash, focus your attention on these critical corrosion zones:
The Frame Rails and Subframes: Pay close attention to structural box sections and tubular frame components. Look for existing drainage holes in the frame; insert your spray nozzle directly into these openings to flush out any sand, mud, and salt crystals trapped inside the hollow internal spaces.
The Top of the Fuel Tank: The narrow gap between the fuel tank and the vehicle’s floor pan is a notorious catchment area for road debris and moisture. If salt crust is left here, it will slowly eat through metal fuel straps and corrode structural floorboard panels.
Exhaust System Hangars and Heat Shields: Thin aluminum thermal shields protect your cabin from exhaust heat. When salt residue lodges between these aluminum shields and steel mounting bolts, it triggers galvanic corrosion, causing the aluminum to dissolve and drop onto the exhaust pipes.
Clearing the Wheel Wells and Quarter Panels
Your vehicle’s tires act like high-velocity fans, continually spraying road salt, slush, and abrasive grit straight into the wheel wells throughout the winter season. This makes the wheel arches one of the most vulnerable areas for body rust.
Flushing Out the Fender Lips
Many modern cars and crossover SUVs feature folded sheet-metal lips along the inner edge of the exterior wheel arches. These folded lips act like miniature shelves, collecting damp dirt, winter road salt, and abrasive sand.
To clean this area, reach your hand inside the wheel arch and manually run your fingers along the backside of the fender lip. You will often find a thick layer of packed mud sitting on the shelf.
Use a flexible hose or a high-pressure wash wand angled carefully from the inside out to completely flush this ledge clear. Keep spraying until the runoff water transitions from a muddy brown or cloudy white to perfectly clear.
Addressing Fabric and Plastic Fender Liners
To reduce highway road noise, many vehicle manufacturers equip modern wheel wells with textured fabric or molded plastic inner liners. While these liners block flying rocks from denting the sheet metal, they also trap fine salt dust behind them.
Direct your wash spray along the outer edges where the plastic liners meet the metal bodywork. If your vehicle features fabric-style liners, give them a thorough, close-up washing with soapy water to draw out embedded salt crystals that have soaked into the material over months of winter travel.
Decontaminating the Exterior Paint Surface
Once the hidden underbody structures are completely clean, you can turn your attention to the exterior painted surfaces. Winter road salt does not just cause rust on bare metal; it also damages your vehicle’s clear coat paint finish.
The Problem of Chemical Etching
When road salt dries on your car’s paint, it creates a dull white haze. If left sitting in direct, warm spring sunlight, the chemical compounds can etch into the delicate clear coat finish, leaving behind microscopic pits and rough textures that diminish the paint’s natural shine.
Furthermore, flying winter road debris creates tiny stone chips on your hood and lower rocker panels. If these chips are left filled with salty residue, rust bubbles will quickly form beneath the paint, causing it to flake off.
The Decontamination Wash Process
To restore and protect your exterior paint, skip the simple drive-through car wash and perform a deep decontamination wash manually using a structured three-step approach:
1. Apply a Dedicated Salt Neutralizer: Before touching the vehicle with a sponge or wash mitt, spray the lower half of the vehicle with a specialized winter salt-neutralizing solution. These products break the chemical bonds holding the stubborn white film to your clear coat, making it easy to rinse away without aggressive scrubbing.
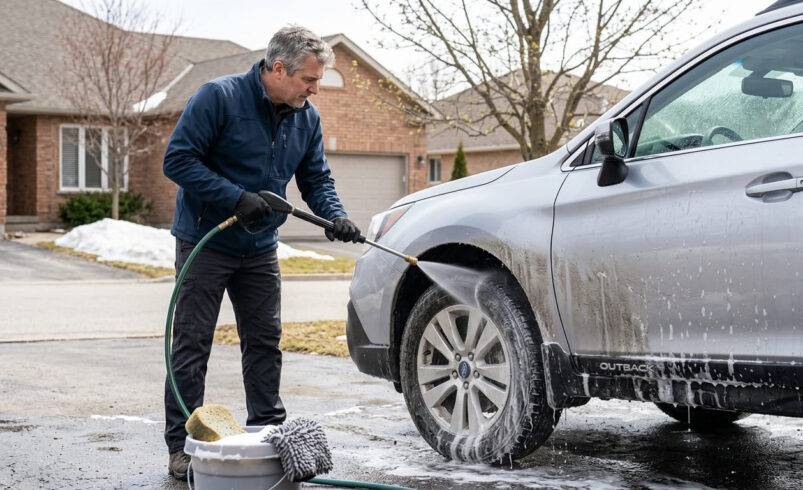
2. The Two-Bucket Wash Method: Wash the car manually using two separate buckets—one filled with a premium, pH-balanced automotive car wash soap and the other filled with clean rinse water. Use a microfiber wash mitt, dipping it into the soapy bucket, washing a panel, and then thoroughly rinsing it in the clean water bucket before gathering more soap. This technique prevents abrasive winter sand particles from scratching your paint finish.
3. Iron Decontamination and Clay Bar Treatment: Spray the clean paint with an automotive iron remover spray. This chemical reacts with microscopic iron filings left behind by winter snowplow blades and brake pads, bleeding purple as it dissolves them. Finish by sliding an automotive detailing clay bar over the wet paint to lift away any remaining embedded industrial fallout, leaving the clear coat perfectly smooth.
Restoring and Lubricating Your Braking System
Your braking system operates in the lowest, most exposed areas of your vehicle chassis, placing it directly in the path of flying road salt, chemical brines, and heavy spring slush.
Preventing Seized Brake Calipers
Because Ontario drivers utilize regenerative braking or light pedal pressure during slick winter driving, the mechanical brake calipers experience very little intense exercise. This lack of movement, combined with constant exposure to corrosive road salt, can cause the mechanical components to seize up over time.
The salt brine causes corrosion to build up on the metal brake pad slider pins and caliper brackets. If these components become encrusted with rust, the brake pads cannot slide freely. This leads to dragging brakes, uneven pad wear, reduced fuel efficiency, and warped brake rotors.
The Spring Brake Service Protocol
To keep your stopping power safe and reliable, include a basic brake service in your spring car care routine. This process involves lifting the vehicle, removing the wheels, and taking apart the brake calipers to inspect the moving pieces.
Use a stiff wire brush to clean away any accumulated rust scale and salt crust from the caliper brackets. Apply a high-temperature synthetic brake lubricant to the caliper slider pins and the metal contact points on the back of the brake pads.
Avoid getting any grease on the actual friction material or rotor surfaces. This quick maintenance step ensures your brakes slide smoothly, prevents premature component wear, and saves you hundreds of currency units in premature brake replacements.
Exterior Body Openings and Drain Holes
Automotive body designers know that water will inevitably find its way inside door panels and inner body cavities during a heavy downpour or a high-velocity car wash. To prevent this moisture from trapping inside and causing internal rust, manufacturers engineer small drainage holes along the bottom edges of doors, rocker panels, and quarter panels.
Unclogging Trapped Water Paths
Throughout an Ontario winter, road salt dust, muddy slush, and rustproofing overspray slowly migrate down through window seals and accumulate at the base of the inner door cavities. This debris forms a thick, mud-like sludge that plugs the small factory drain holes.
When spring rains arrive, water enters the door frame but cannot drain out due to the plugged holes. The water ponds inside the door base, sloshing around as you drive.
Because the trapped water is highly contaminated with road salt residue, it eats through the inner door seams from the inside out. This leads to “door bottom rot,” a common cosmetic issue on older Ontario vehicles.
Locating and Clearing the Drains
To prevent internal door rot, open your vehicle’s doors, tailgate, or trunk lid and look closely along the lowermost painted edges. You will see small, elongated slots or square openings spaced every few centimeters.
Take a small plastic zip-tie, a thin wooden skewer, or a small flathead screwdriver and gently insert it upward into each drainage hole. Wiggle the tool around to break loose any dried mud or packed salt sludge.
Once the opening is clear, you will often see trapped water drain out immediately. Finish by spraying a small amount of clean water down through the inner window channels to flush any remaining salt residue out through the newly cleared drainage path.
Interior Salt Stain Extraction—Protecting Your Carpets
While road salt does its worst damage underneath your vehicle, it also creates a major aesthetic headache inside the passenger cabin. Every time you climb into your vehicle with snowy winter boots, you bring white sodium chloride crystals straight onto your cabin carpets.
The Threat of White Crust Rings
As the snow melts off your boots, the salty water soaks deep into the porous carpet fibers. When the moisture evaporates, it leaves behind rock-hard, bright white salt rings that look unsightly and ruin the texture of the fabric.
If left unaddressed, this salt buildup hardens over time, bonding chemically to the synthetic carpet fibers. The rough crystals can slowly cut through the delicate fabric weave, eventually wearing holes completely through your floorboards.
The Vinegar Extraction Technique
Standard carpet cleaners and household soaps are rarely effective at breaking down stubborn winter salt rings. To dissolve the hardened crystals completely, you need an acidic cleaning solution that can break the strong chemical bonds.
You can create an effective, low-cost salt remover at home using a simple recipe:
The Solution Mixture: Mix a simple one-to-one solution of warm water and plain white household vinegar inside a standard spray bottle.
The Application Method: Spray the vinegar solution generously over the white salt stains. Allow the acidic mixture to sit on the carpet for five to ten minutes to dissolve the hardened salt rings. You will hear a light fizzing sound as the vinegar breaks down the mineral deposits.
The Extraction Step: Use a stiff-bristled scrubbing brush to agitate the area, pulling the dissolved salt up to the surface. Blot the wet area firmly with a clean, dry microfiber towel, or use a wet-dry shop vacuum to extract the brines out of the carpet tracking. Repeat the process on stubborn stains until your carpet returns to its original color and soft texture.
Engine Bay Detailing and Electronic Connection Safety
The final stage of your comprehensive spring decontamination process takes place beneath the hood. Modern vehicles feature open engine bays that allow air to circulate for cooling. Unfortunately, this design also allows atomized winter road salt mist to float directly into the engine compartment at highway speeds.
Shielding Sensitive High-Voltage Systems
When a fine layer of white salt dust settles over your engine components, it forms a light film over aluminum cylinder heads, steel brackets, radiator cores, and plastic electrical wiring harnesses. Because salt naturally absorbs moisture from the air, this layer remains damp, leading to oxidation on aluminum parts and corrosion inside delicate electrical sensor connectors.
For owners of modern hybrid and electric vehicles (EVs), keeping the engine bay clean is especially important. While high-voltage connections are securely sealed, keeping the surrounding areas free of salt crust avoids unexpected grounding faults or corrosion-induced sensor errors.
Safe Engine Washing Protocols
Cleaning a modern engine bay requires care to avoid damaging electronic systems. Never use a high-pressure pressure washer wand up close on sensitive engine electronics, alternator housings, or fuse boxes, as the intense water pressure can bypass rubber weather seals and cause electrical shorts.
Instead, wait for the engine to cool down completely. Cover the alternator, open air intake, and main fuse box with a plastic shopping bag secured with a rubber band. Spray a gentle, water-based automotive degreaser over the dirty metal surfaces and allow it to loosen the grime for five minutes.
Using a standard garden hose equipped with a gentle shower spray nozzle, rinse the engine compartment clean from the center out. Once finished, remove the protective plastic bags and use compressed air or a leaf blower to blow any standing water out of recessed spark plug holes and bolt tracks before starting the vehicle.
Spring Car Care Action Plan
To ensure your vehicle transitions into the summer driving season in peak condition, use this quick action checklist during your spring weekend routine:
Schedule the Deep Wash: Dedicate an hour to a thorough, high-pressure underbody and wheel-well wash to dislodge packed winter brines.
Decontaminate the Paint: Use a salt neutralizer and iron remover to clear winter film and metal filings from your clear coat.
Inspect the Brakes: Perform a spring brake lubrication service to clean out slider pins and preserve stopping capability.
Clear Body Openings: Verify that all door, rocker, and tailgate drain holes are completely clear of sludge.
Extract Interior Stains: Apply a warm water and vinegar mixture to dissolve white salt ring deposits from your carpets.
Refresh the Engine Bay: Execute a low-pressure rinse of the engine compartment to safeguard sensors and metal housings from corrosion.
By taking the time to thoroughly clean your vehicle inside and out every spring, you halt the progression of cold-weather corrosion, preserve your vehicle’s structural safety, and protect its long-term resale value from the unique challenges of Ontario’s winter road conditions.