When spring finally breaks across Brampton Spring Car Detailing, the sense of relief is almost physical. The heavy snowfalls stop, the freezing winds die down, and residents head out to places like Gage Park or Chinguacousy Park to enjoy the first warm afternoons of the year. But while you are ready to shed your heavy winter coat, your car is still wearing its own winter jacket—one made of crusty road salt, corrosive brine, greasy road sludge, and months of accumulated grime.
Driving through a Brampton winter is a harsh endurance test for any vehicle. To keep the roads safe and ice-free, city maintenance crews spread thousands of tons of rock salt and liquid calcium chloride across major arteries like Steeles Avenue, Bovaird Drive, and Highway 410. While excellent for traffic safety, this chemical cocktail is an absolute disaster for your car. It eats away at your paint, corrodes your undercarriage, and leaves stubborn, unsightly white crusts embedded deep within your interior carpets.
Leaving winter grime on your vehicle into the spring and summer is not just an aesthetic issue; it is a financial one. Left untreated, road salt accelerates rust formation, degrades rubber seals, and tanks your vehicle’s resale value.
This comprehensive guide covers everything you need to know about spring car detailing in Brampton. Whether you plan to tackle the job yourself in your driveway or want to know exactly what professional detailers look for, this step-by-step blueprint will restore your car to showroom glory and protect your investment.
The Hidden Danger: Why Brampton Spring Car Detailing
Before picking up a bucket or a vacuum, it helps to understand Brampton Spring Car Detailing what you are fighting. Road salt is fundamentally sodium chloride or calcium chloride. When mixed with melting snow and water, it forms an acidic electrolyte solution.
The Chemistry of Rust and Corrosion
Your car is built primarily of steel, aluminum, and various protective coatings. When an acidic salt solution comes into contact with bare metal or microscopic chips in your paint, it creates a chemical reaction called oxidation.
Salt acts as a catalyst that speeds up this process drastically. Moisture provides the oxygen, and the salt creates an easy pathway for electrical currents, allowing rust to spread like a virus across your vehicle’s subframe, brake lines, exhaust systems, and lower body panels.
The Abrasive Nature of Road Sludge
Winter road grime is not just salt. It is a thick slurry composed of pulverized asphalt, brake dust, leaked automotive fluids, and fine sand spread for traction. When this mixture dries on your vehicle’s clear coat paint finish, it turns into a highly abrasive sandpaper-like film.
If you attempt to wipe down a dirty car without a proper pre-wash routine, you will drag these microscopic rock and sand particles across your paint, causing thousands of swirling scratches that ruin the paint depth and shine.
Deep Cleaning Your Exterior: The Safe Wash Routine
To clean your exterior without scratching the delicate clear coat, follow a strict multi-stage wash process designed to lift and neutralize contaminants safely.
The Critical Undercarriage Blast
The absolute worst damage occurs where you cannot see it. Your vehicle’s undercarriage takes a direct hit from road brine all winter long.
Before washing the top of the vehicle, use a pressure washer equipped with an undercarriage cleaner attachment, or visit a local Brampton touchless car wash that offers an undercarriage blast. Focus intensely on the wheel wells, behind the plastic fender liners, and along the rocker panels where salt cakes into thick deposits.
The Pre-Rinse and Foam Bath
Never touch a dry, dirty car with a wash mitt. Start by rinsing the entire vehicle with clean water from top to bottom to remove loose mud and heavy dirt chunks.
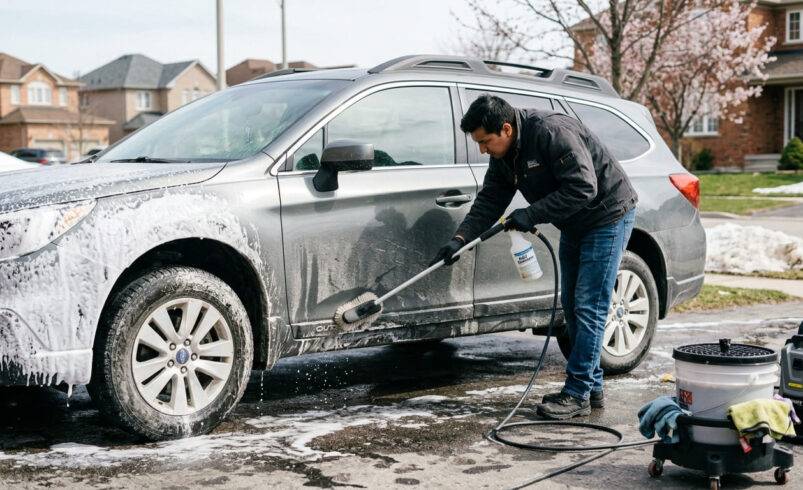
Next, apply a thick layer of dedicated automotive snow foam using a foam cannon attached to a pressure washer. Let the foam sit on the vehicle for three to five minutes without letting it dry. This allows the soap surfactants to safely encapsulate the abrasive dirt particles and lift them away from the paint surface.
The Two-Bucket Method
To prevent scratching your paint during the contact wash, employ the classic two-bucket washing system:
Bucket One (Wash): Filled with warm water and a high-lubricity automotive shampoo.
Bucket Two (Rinse): Filled with pure, clean water and fitted with a grit guard at the bottom.
Dip your clean microfiber wash mitt into the wash bucket, gently clean a section of the car working from top to bottom, and then immediately submerge the mitt into the rinse bucket. Rub the mitt against the grit guard to release the trapped dirt before dipping it back into the clean wash soapy water. Wash the vehicle in straight lines rather than circular motions to prevent swirl marks.
Decontaminating and Re-Protecting Your Paint
Once the vehicle is washed and dried with a plush microfiber drying towel, you will likely notice that the lower panels still feel rough to the touch. This roughness is caused by embedded contaminants like brake dust and industrial fallout that have baked into the clear coat.
Chemical Iron Decontamination
Spray a dedicated iron remover across the lower half of the vehicle and the wheels. These products react chemically with embedded iron particles, turning a deep purple or color as they dissolve the metallic debris. Rinse thoroughly with water after a few minutes.
The Clay Bar Process
For a perfectly smooth surface, use a detailing clay bar. Spray a generous amount of clay lubricant onto a small section of the vehicle and gently glide the clay bar back and forth across the paint. The clay will catch and pluck out any remaining microscopic contaminants, leaving the paint feeling slick like glass.
Laying Down Fresh Spring Protection
With the paint completely clean and bare, you must reapply a layer of protection to seal out the spring rain and UV rays. Depending on your preference and budget, you can apply:
High-Quality Carnauba Wax: Provides a deep, warm shine but typically lasts only six to eight weeks.
Synthetic Paint Sealants: Offers excellent durability and protection for up to six months.
Ceramic Coating Sprays: Utilizes silicon dioxide technology to form a highly hydrophobic barrier that repels water and grime for up to a year, making future washes incredibly easy.
How to Destroy Interior Salt Stains for Good
The interior of a vehicle takes an incredible beating during a Brampton winter. Passengers track in snow, slush, and salt on their boots, which melts and saturates the carpet fibers. When the water evaporates, it leaves behind rock-hard, unsightly white crusts that normal carpet cleaner cannot dissolve.
The Secret Chemical Fix: Vinegar and Water
Standard soap and water will not touch heavy salt stains because salt is an alkaline mineral deposit. To dissolve it, you need a mild acid to neutralize the alkalinity.
Mix a solution of fifty percent white vinegar and fifty percent warm water in a clean spray bottle. The vinegar breaks down the calcium and sodium deposits without damaging your automotive fabrics.
The Interior Extraction Method
Pro Tip: To prevent this labor-intensive process next winter, invest in a set of heavy-duty, custom-fit rubber floor liners. Brands like Weather Tech or TuxMat feature high walls that trap snow, slush, and salt brine before it ever reaches your factory carpets.
Deep Cleaning Wheels, Tires, and Wheel Wells
Your wheels and tires face the harshest environment on the road, coming into constant contact with salt, slush, road tar, and abrasive brake dust.
Restoring the Wheels
Use a dedicated, non-acidic wheel cleaner that safe for your specific wheel finish (alloy, painted, or chrome). Spray the cleaner on and allow it to dwell, then agitate the surface using a soft barrel brush to clean deep inside the barrel of the wheel, and a detail brush for the lug nut pockets. Rinse completely with a pressure washer.
Stripping Tire Grime
Tires often turn a brown, dingy color over the winter—a process known as blooming. This is caused by antiozonants within the rubber migrating to the surface to protect the tire from cracking.
Spray a heavy-duty tire cleaner or all-purpose cleaner onto the rubber and scrub vigorously with a stiff nylon tire brush. The foam will turn brown as it pulls out the grime. Rinse and repeat until the suds stay white. Once dry, apply a water-based tire dressing to restore a rich, dark satin finish.
Restoring Interior Surfaces and Cabin Air Quality
Winter driving requires keeping the windows rolled up tightly for months at a time, meaning skin oils, dust, and heater residue become trapped inside the cabin.
Cleaning Dashes and Door Panels
Wipe down all hard plastics, vinyl, and leather surfaces using a dedicated interior detailer or a highly diluted, mild all-purpose cleaner. Avoid products that contain heavy silicone, as they leave behind a greasy, high-gloss film that reflects sunlight dangerously into your eyes and attracts airborne dust. Opt for a matte or satin finish dressing that offers integrated UV protection to prevent future fading or cracking.
Crystal Clear Glass
A film of oily residue often forms on the inside of car windows during the winter due to the constant use of the defrost system.
Clean all glass surfaces using a dedicated automotive glass cleaner that contains no ammonia (ammonia can damage aftermarket window tint). Use the two-towel method: spray the cleaner onto a low-pile microfiber towel, wipe the glass thoroughly to lift dirt, and immediately buff the glass dry with a second, clean waffle-weave microfiber towel to eliminate streaks.
Replacing the Cabin Air Filter
If you notice a musty, stale smell inside your car when you turn on the spring air conditioning, your cabin air filter is likely clogged with winter dust, salt particles, and organic matter.
Consult your vehicle manual—most cabin filters are easily accessible behind the glove box and can be swapped out at home in less than ten minutes without any specialized tools. Replacing this filter ensures clean, fresh air for you and your passengers throughout the upcoming warm months.
Complete Spring Detailing Checklist for Brampton Drivers
Use this organized checklist to track your progress and ensure you do not miss any critical areas during your spring cleanup routine:
Spring Car Care
Spring car detailing is more than just a regular chore; it is an act of preservation. By investing a few hours of work or booking a professional detailer early in the season, you halt the corrosive damage of winter road salt, restore your vehicle’s appearance, and ensure that your asset remains valuable and safe to drive for years to come.