Welcome to the Winnipeg DIY, where the sunset skies are vast and the winter nights are long. As a driver in Winnipeg, you know that visibility isn’t a luxury—it’s a critical safety issue. From spotting deer on the Perimeter Highway to navigating a snow-swept Pembina Highway, your headlights are your first line of defence.
Yet, look closely at your Winnipeg DIY. If your headlights have taken on a hazy, yellow, or cloudy film, you are losing light output, sometimes. This dull, aged look is caused by UV damage (sun oxidation) breaking down the protective coating on the plastic lenses. In our climate, this damage is often compounded by road salts, extreme temperature swings, and general prairie grime.
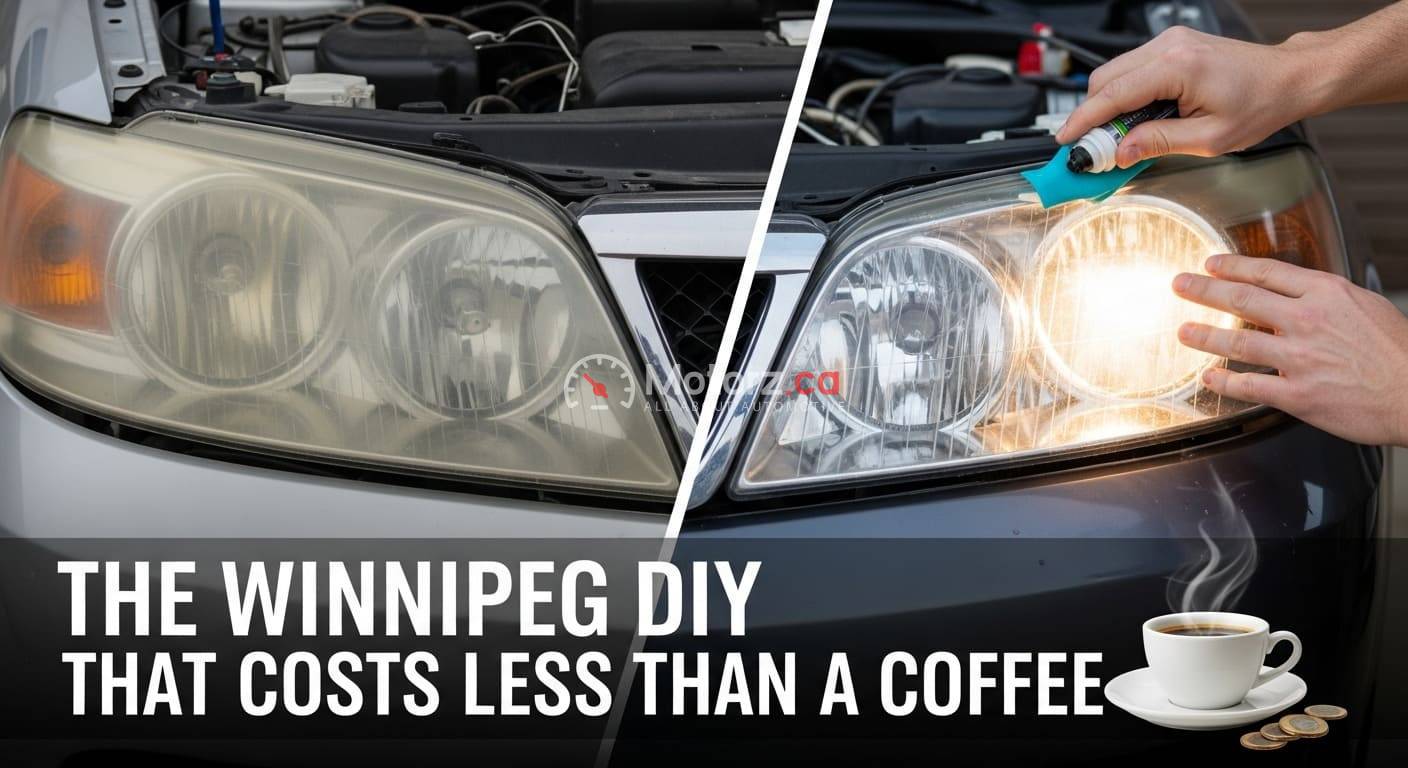
We’re going to show you a simple, effective, and incredibly cheap DIY headlight restoration method that uses items you probably already have in your bathroom and kitchen.
The budget? Less than the price of your morning Winnipeg DIY.
Why You Must Restore Your Headlights
This isn’t just about making your Winnipeg DIY look good, though that’s a nice bonus. This is fundamentally about Winnipeg road safety and protecting yourself and others.
The Danger of Dim Lights
A cloudy lens acts like a frosted Winnipeg DIY, scattering and blocking the light from your bulbs. This drastically reduces the distance you can see ahead. On a dark, unlit road—like many stretches outside the city or during a sudden prairie fog—that lost visibility can be the difference between avoiding a collision and an accident.
The Manitoba Climate Factor
Our extreme climate accelerates headlight Winnipeg DIY. The summer sun delivers intense UV damage, followed by a winter full of abrasive road grit and corrosive salt spray, which eats away at the plastic coating. Headlight clarity is arguably more important here than in most other places in Canada due to the sheer lack of ambient light on rural roads and the low-visibility conditions of a Manitoba winter drive.
Vehicle Appearance and Value
Clear, sparkling headlights instantly take years off your vehicle’s age. If you’re looking to sell or trade in your car, restoring your lenses is one of the highest-impact, lowest-cost ways to boost its curb appeal and perceived value.
The Budget Breakdown: Less Than a Latte!
The whole point of this guide is the ultra-low cost. Forget specialized chemicals and power tools (for now). We are relying on the mild abrasive power of common household items.
The Star Ingredient: Non-Gel Toothpaste
The secret is the tiny, microscopic scrubbing Winnipeg DIY (usually silica or calcium carbonate) found in traditional, non-gel toothpaste. These particles are abrasive enough to gently sand away the thin layer of oxidized, yellowed plastic, but gentle enough not to scratch the underlying lens.
Cost: You already own it, but even a dollar-store tube of paste.
The Power-Up Option: Baking Soda Paste
For heavily oxidized lenses, you can Winnipeg DIY your abrasive power by mixing baking soda (sodium bicarbonate) with a small amount of water to create a powerful, yet controlled, cleaning paste.
Cost: A box of baking soda is typically under $5.00 and lasts forever.
Essential Accessories (You Should Already Have)
Microfiber Cloths or Soft Rags: To apply and buff.
Masking Tape/Painter’s Tape: To protect the Winnipeg DIY paint from the abrasive action. (Under $5.00 for a roll)
Water: For rinsing. (Free)
The Step-by-Step Winnipeg DIY Restoration Method
This method takes approximately 15-30 minutes per Winnipeg DIY, depending on the severity of the oxidation and your scrubbing effort.
Preparation: Clean and Protect
Wash the Lenses:
Use mild soap and water (car wash soap or dish soap) to thoroughly clean the headlights. You must remove all surface dirt, dust, and grime. Dry the lens completely. 3.1.2. Tape Off the Paint: This step is crucial. Apply painter’s tape or masking tape around the entire perimeter of the headlight where the plastic meets the car’s paint or trim. This prevents your scrubbing and the abrasive paste from damaging the clear coat of your car’s paint job.
The Scrubbing Phase: Applying the Abrasive
Apply the Paste:
Squeeze a generous amount of non-gel toothpaste directly onto the headlight lens or onto a clean, damp microfiber cloth. For the baking soda method, apply the paste. 3.2.2. Scrub Vigorously: Using firm, circular motions, scrub the entire surface of the lens. You will immediately see a yellowish, cloudy residue coming off onto your cloth—that is the oxidized plastic layer being gently sanded away.
The Elbow Grease Factor: Don’t be Winnipeg DIY! This is where the magic happens. Continue scrubbing for 3-5 minutes per headlight, focusing on the haziest areas. Reapply toothpaste as needed to keep the surface lubricated and abrasive.
The Reveal: Rinse and Buff
Rinse Clean:
Use clean water (a spray bottle works well) to rinse away all the toothpaste/baking soda residue. Wipe the lens clean with a new, fresh cloth. 3.3.2. Inspect the Results: Pat the lens dry and inspect it closely. If it is significantly clearer but still shows slight haze, repeat the scrubbing process (Step 3.2). For many mildly-to-moderately oxidized lights, one Winnipeg DIY is enough to see a dramatic difference in headlight clarity.
Crucial Maintenance: Sealing the Deal for Longevity
The one drawback of the ultra-cheap DIY method is that you’ve removed the old, failed UV coating. If you stop here, the new clear layer will quickly oxidize again—especially in a sunny prairie climate like Winnipeg.
The Essential UV Protection Step
To make your restoration last, you must apply a new layer of UV protection. This is the only step that will cost you more than a coffee, but it will save you from having to do this job every three months.
Basic Wax (Short Term): A thin layer of Winnipeg DIY wax can offer temporary protection, but it wears off quickly.
Headlight Sealant or Coating (Best Value): Buy a dedicated UV headlight sealant or automotive clear coat spray (small can). This will be your only true investment. Follow the product’s directions for application, which usually involves a simple wipe-on or light spray.
Long-Term Headlight Maintenance Tips
Regular Cleaning: Keep your lenses free of road salt and dirt, especially during the winter.
Park Smart: Whenever possible, park your car in a garage, carport, or shaded spot to minimize direct sun exposure and reduce UV damage.
Check Annually: Make headlight restoration an easy annual chore, perhaps when you switch over to your winter tires, to keep your visibility at maximum performance.