There is a profound difference between Car Detailing a car and “detailing” one. A quick run through the local touchless car wash might remove the top layer of dust, but it often leaves behind a film of road grime, water spots, and untouched contaminants. Professional detailing is an art form—a meticulous process of cleaning, restoring, and protecting every inch of a vehicle to make it look, feel, and even smell better than the day it left the showroom.
In the world of “The Corner Wrench,” we believe that a clean car isn’t just about vanity; it’s about preservation. In 2026, vehicle prices have reached historic highs, making it more important than ever to protect your investment. Road salt in Ontario, sap in British Columbia, and the scorching sun in Alberta all take a toll on your paint and interior.
At Motorz, we want to bridge the gap between the casual driveway wash and the high-end professional studio. Today, Lorraine Explains the secrets of the pros. We are diving deep into the “two-bucket” method, the science of paint decontamination, and the best ways to protect your interior from the rigors of daily life. Grab your microfibers—it’s time to get to work.
The Car Detailing: Setting the Stage for Success
Most swirl marks and scratches aren’t caused by Car Detailing; they are caused by improper washing. If you start scrubbing a dry, dirty car, you are essentially rubbing sandpaper across your clear coat.
Wheels and Tires First
The pros always start with the wheels. Why? Because wheels are the dirtiest part of the car, covered in corrosive brake dust and road tar. If you wash your paint first and then do the wheels, you’ll likely splash nasty grime back onto your clean panels. Use a dedicated wheel cleaner and a soft-bristle brush to get into the barrels and around the lug nuts.
The Power of the Pre-Soak
Before you touch the paint with a mitt, you need to loosen the dirt. If you have a foam cannon or foam gun, now is the time to use it. Covering the car in a thick layer of snow foam allows the soap to dwell and lift contaminants away from the surface. If you don’t have a foam cannon, a thorough rinse with a pressure washer (using a wide-angle nozzle) is essential.
The Contact Wash: The Two-Bucket Method
If you take only one tip from this guide, let it be this: The Two-Bucket Method is the gold standard for safe washing.
How It Works
You need two buckets equipped with “grit guards” (plastic inserts that keep dirt at the bottom).
Bucket One: Filled with clean water and high-quality car shampoo.
Bucket Two: Filled with plain rinse water.
Dunk your wash mitt into the soapy water, wash a section of the car, and then immediately rinse the mitt in the plain water bucket before going back for more soap. This ensures that the dirt you just pulled off the car doesn’t get rubbed right back onto the next panel.
Wash from Top to Bottom
Gravity is your friend. Start at the roof and work your way down. The lower panels of the car (rocker panels and bumpers) hold the most abrasive grit, so you want to save those for last to keep your wash mitt as clean as possible for the sensitive hood and trunk areas.
Decontamination: Beyond the Surface
Even after a thorough wash, your paint might still feel “bumpy” or rough to the touch. These are embedded contaminants like industrial fallout, rail dust, and tree sap.
Chemical Decontamination
Use an iron remover spray. These products react with iron particles embedded in the clear coat, turning purple as they dissolve the metal. This is a crucial step for vehicles in industrial areas or those that park near railways.
The Clay Bar Process
A clay bar is a specialized synthetic resin that “plucks” contaminants out of the paint. Use plenty of clay lubricant and gently glide the bar over the surface. When the paint feels as smooth as glass, you’ve succeeded. This step is vital if you plan on applying a wax or ceramic coating, as it ensures the protection bonds directly to the paint.
Drying Without Damage
Drying is where many people go wrong by using old bath towels or chamois that can trap dirt and scratch the paint.
Microfiber is King
Use a large, high-quality “twisted loop” microfiber drying towel. Instead of rubbing, lay the towel flat across the panel and pat it or slowly pull it toward you. This “wicking” action lifts the water without friction.
Using a Drying Aid
A quick spray of a “detail spray” or “drying aid” while the car is still wet adds a layer of lubrication, making the towel glide easier and adding a boost of shine as you dry.
Interior Detailing: The Deep Clean
The average driver spends hundreds of hours a year inside their car. A professional interior detail focuses on hygiene as much as aesthetics.
The “Dry” Clean First
Before you reach for any liquids, do a thorough vacuum. Use an air compressor or a “detailing brush” to agitate dirt out of the seams of the seats and from between the center console. You’ll be surprised how much hidden dust comes to light.
Cleaning Surfaces
Use a dedicated interior cleaner that offers UV protection. Avoid “shiny” silicone-based dressings; the pros prefer a matte or satin finish that looks like factory-fresh plastic. For leather seats, use a pH-balanced cleaner and a soft horsehair brush to lift oils from the grain, followed by a conditioner to keep the material supple.
Crystal Clear Glass
To avoid streaks, use two microfiber towels for the glass. Spray the cleaner onto the first towel (not the glass), wipe the window, and immediately follow up with the second, dry towel to buff away any residue.
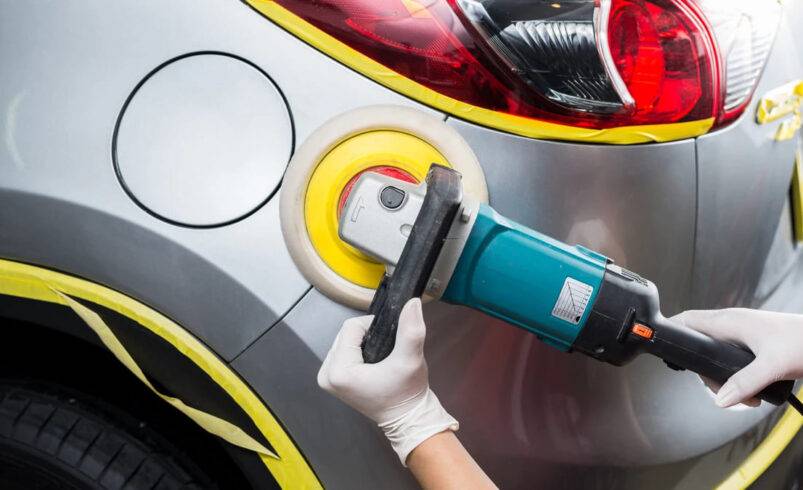
Protection: Wax, Sealants, and Ceramics
Now that the car is surgically clean, you need to seal it. Without protection, the sun’s UV rays will oxidize the paint, turning your vibrant color dull and chalky over time.
Carnauba Wax vs. Synthetic Sealants
Carnauba Wax: Provides a deep, warm glow and incredible water beading. However, it usually only lasts 4 to 6 weeks.
Synthetic Sealants: These are engineered polymers that offer much better durability, often protecting the paint for 6 months or more.
The 2026 Trend: Ceramic Coatings
Ceramic coatings (SiO2) have become incredibly accessible. They provide a semi-permanent layer of “glass” over your paint that is extremely hydrophobic, meaning water and dirt simply slide off. While professional-grade coatings can last years, “ceramic sprays” are now available that provide amazing protection with the simple wipe-on, wipe-off ease of a wax.
The Professional Results Checklist
Professional detailing isn’t about expensive machines; it’s about the process and the patience. At Motorz, we recommend setting aside a full morning twice a year for a deep detail.
Clean wheels first to prevent cross-contamination.
Use two buckets to keep your wash mitt grit-free.
Decontaminate with clay to achieve a smooth-as-glass finish.
Dry with microfiber to avoid creating swirl marks.
Protect the surface with a sealant or ceramic to lock in the shine.
Detail the interior with matte-finish UV protectants for a factory look.
By following these steps, you aren’t just cleaning your car; you are performing essential maintenance that keeps the resale value high and your pride of ownership even higher. A well-detailed car is a joy to drive and a testament to the care you put into your machine.